Soldering is an indispensable job in the electronics industry, especially when getting the job done while making circuit boards. It is one of the most commonly known issues that technicians and engineers are tasked with addressing with electric circuits: that is, solder bridging, which means that solder creates an unwanted connection between two conductive points.
This guide aims to present a complete picture of the ways to avoid and fix solder bridges, which may be broken down into the brands of soldering situations, the most typical reasons for a solder elimination, and practical recommendations for treating the problem.
Understanding Solder Bridging
The joint failure known as solder bridging is the bridging of melted solder between any two pin boreholes, which results in the undesired electrical link. This may result in an open circuit termination or even unnecessary damage to other components if the problem is not tackled properly.Solder bridging is usually caused by excess solder, closing the gap between missing leads, or an incorrect soldering method.
What is a solder bridge?
A solder bridge is an unexpected electric connection created from molten solder in an adjacent conductive spot of the route. Do you know that? A solder bridge is a connection of two or more pads made by the excessive applications of the solder that will create bridges between them. Such bonds can produce a short circuit that, if unresolved properly, can cause a lot of problems.
Preventing Solder Bridging
Success in preventing the defect can be achieved through the avoidance of solder bridging. Here are some tips to help prevent solder bridges:
Proper Flux Application
Flux serves not only as a cleaning agent but also as a variety of solder filaments of different metal composites that improve the soldering process and make it easier. Apply flux only enough to prevent excessive solder drop.
Correct Soldering Iron Temperature
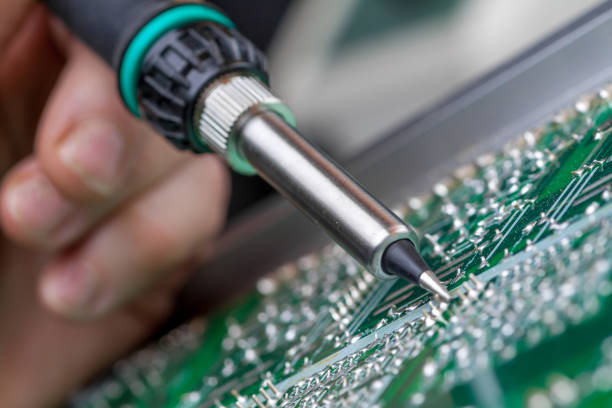
The right temperature of the iron is also worth considering. Too low or too high temperatures might cause the solder to flow excessively, creating bridges and contact failures.
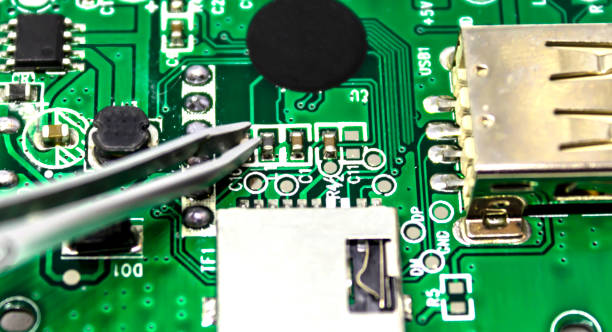
Component Placement
Provide a justified component to prevent bridges. You may be using a stencil or template to centralize component placement.
Solder Mask
A soldering mask is a protection guard made to prevent the solder from getting into areas it should not. It is important to make sure that the solder mask is in the right areas and that each area is covered entirely. However solder mask defined pads as well.
What causes solder bridges to occur?
Consequently, solving problems like imperfect techniques, misplaced components, and flux can be averted by reducing the number of solder bridges during the circuit board assembly. Solder bridges can occur due to various factors, including:
1. Excessive Solder bridges
The solder can become more flowing, and as a consequence, building bridges across the components might happen into the solder bridging risk.
2. Improper Soldering Technique
The wrong soldering techniques, like applying high temperatures or applying very much pressure, will create bridges.
3. Inadequate Spacing
Bad soldering with components spirally placed can easily lead to solder bridge formation of the bad solder paste stencils.
4. Poor Flux Application
The problem of missed places (bridges) is mainly caused by the lack of flux cleanliness and uniformity of the layer, leaving uncleaned surface pads.
5. Solder Mask Issues
Shortages and power faults of the solder mask layer may make the soldering go beyond the joint appointee it should have been and create bridges.
Fixing Solder Bridges
Bridges of solder might occur even after applying the utmost caution. Here’s how to fix them:
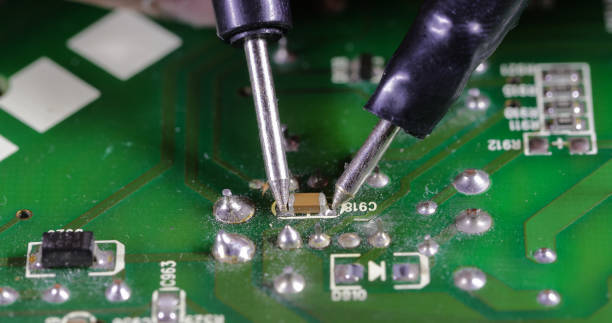
Use Solder Wick
Solder wick rates, which are also known as desoldering braid, are copper braids coated with flux. Elevate the wick over the solder bridge and apply your soldering iron carefully to the joint. The wick/wick technique will be used to absorb the extra solder.
Solder Sucker
A solder sucker or desoldering pump can be utilized with the intent of removing the excess solder. Holding the soldering iron tip over the solder bridge, press the button to initiate the sucking system’s vacuum, which in turn sucks out the solder.
Fine-Tip Soldering Iron
Apply a fine-tip soldering iron to remove excessive liquid metal while avoiding collateral damage to adjacent components.
Commonly Known Soldering Bridging Issues

Commonly known solder bridging issues include:
Excessive Solder bridge
Applying excessive solder will cause damage to nearby two pads or two adjacent pins using pad diameter.
Inadequate Spacing
Placing components too closely can expose the solder joints to electrical or heat bridges. This may make it riskier to solder the components by hand on solder reflow.
Incorrect Soldering Technique
Insufficient skills that include the wrong temperature or inconsistency while applying pressure can create short circuits, apart from numerous other soldering mistakes.
Insufficient Flux
By cleaning, deliberation of flux prevents germination and the formation of filaments and shields hairpins from getting broken. Insufficiency of flux can result in partial cleaning and even bridging; as a result, we might get uneven surface tension on metal pieces.
Solder Mask Defects
If the masks become damaged or are not covered to a sufficient extent, the solder can flow to inappropriate locations, thus creating bridges.
Component Alignment
The lack of precision and alignment when assembling components may cause the formation of solder bridges between neighboring leads and solder pads.
These issues can be mitigated by undergoing specified training sessions, utilization of appropriate materials, and a careful inspection process to prevent the formation of substandard soldering connections.
Solder mask color and Solder mask relief (Minimum)
The following table provides an overview of common solder mask colors and the minimum recommended solder mask relief for circuit board assembly:
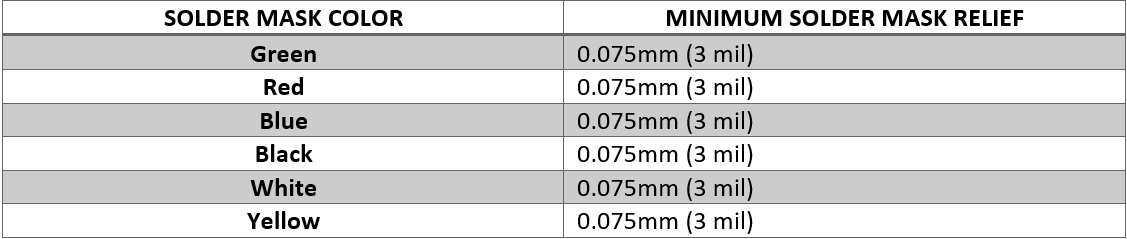
Generalization of the perspective signifies that these values should be viewed as suggestions that could be revised based on the specific PCB design and manufacturer requirements. Industrial PCB assembly houses manufacturer’s recommendations on solder mask dam colors and relief are what they call for; make sure you follow their specifications accordingly.
How to Fix Solder Bridges

Joints in circuits are usually called solder bridges. A repair operator working with electronic assemblies is supposed to deal with them. Here’s a step-by-step guide on how to fix solder bridges:
- Identify the Solder Bridge: With a magnifying glass or microscope, seek for the soldering connection between two electric conduction points.
- Prepare the Work Area: Make the working area well-lit, and you are free from any hindrances that can stop you from doing your work.
- Gather your tools: You will need a soldering iron, a desoldering tool or pipe, flux, and perhaps a magnifying glass or microscope.
- Apply flux: flux the smallest amount possible to the solder bridge. Solder flux, in turn, has a positive effect on solder flow and improves the ease of soldering.
- Use Desoldering Braid: Ensure that the desoldering braid is on top of the solder bridge, and apply the heat of the soldering iron. To finish soldering, gently flow the extra solder into the braid that will become the lead, thereby removing any solder bridges.
- Use a Soldering Iron: As an alternative, if you do not have a solder bridge, you can use a soldering iron to melt the solder and then remove the bridge. While not using too much heat is the message, it’s important to understand that this can affect the parts.
- Inspect Your Work: Having detached the solder bridge in the next procedure, one should look at the region once more to check if the solder bridge was eliminated and if no traces of solder are left.
- Clean the Area: Use a cotton swab and some alcohol with at least 90% ethanol to clean the area as well as remove any excess flux.
- Reassemble the circuit: When the area is cleaned up, repair the circuit by reassembling it and testing the circuit that prevents the solder bridge forms.
Accordingly, you will be able to extrapolate the given measures and so produce the soundness of your circuit board collection assembly.
FAQ
Conclusion
The fact is that the process of soldering bridge wires requires knowledge of expert wave solder operation for the staff members engaged in the construction of circuit boards. Appreciating the factors that cause solder bridges and applying necessary precautions thus reduces the risk of getting solder bridges and provides efficient solder joints and both surface mount. If you lock yourself out before you are out, you will be able to go through it and fix it fast to ensure your circuits are intact. Correct lead lengths for through-hole parts Through-hole components with leads that are too long can cause solder bridges that have correct hole size.